In this chapter we are going to use the camera to control the Turret to automatically track the target. The class that we will use to connect to the camera is called PiCamera. Now rather than use the PiCamera class directly, we are going to create our own class which will encapsulate the PiCamera class and allow us to connect to the camera as well as manage the frame data in an organized way.
Since accessing and manipulating the camera is complex I am going to provide you with code for this Camera class which handles the connection to the camera and manages retrieving the frames.
|
1 2 3 4 5 6 7 8 9 10 11 12 13 14 15 16 17 18 19 20 21 22 23 24 25 26 27 28 29 30 31 32 33 34 35 36 37 38 39 40 41 42 43 44 45 46 47 48 49 50 51 52 53 54 55 56 57 58 59 60 61 |
package robot; import robotCore.Device; import robotCore.DigitalOutput; import robotCore.Logger; import robotCore.PiCamera; import robotCore.PiCamera.PiCameraRegion; import robotCore.PiCamera.PiCameraRegions; public class Camera { // @SuppressWarnings("unused") private final static String m_ip = "172.24.1.1"; private static final int k_pin = Device.M3_2_PWM; private final PiCamera m_camera = new PiCamera(); private final DigitalOutput m_light = new DigitalOutput(k_pin); public class CameraFrame { PiCameraRegions m_regions = m_camera.getRegions(); /* * * Returns true if there is at least one region visible */ public boolean isVisible() { return (m_regions != null) && (m_regions.getRegionCount() >= 1); } /* * Returns the horizontal center of the first visible region with respect to the * horizontal target position set by the image viewer * * NOTE: This function should ONLY be called if isVisible returns true */ public int getTargetCenter() { PiCameraRegion region = m_regions.getRegion(0); // Logger.Log("Camera", 1, String.format("left=%d, right=%d", region.m_topLeft, region.m_topRight)); return ((region.m_bounds.m_left + region.m_bounds.m_right) / 2) - m_regions.m_targetHorzPos; } } public Camera() { m_camera.connect(m_ip, 5800); } public void setLight(boolean on) { Logger.log("Camera", 2, String.format("SetLight: %s", on ? "on" : "off")); m_light.set(on); } public CameraFrame getCurrentFrame() { return new CameraFrame(); } } |
You will also notice that you can control the green LED via the setLight function. Before we continue you need to create a Light command which will let you toggle whether the light is on or off. You will need to use this command in the next section.
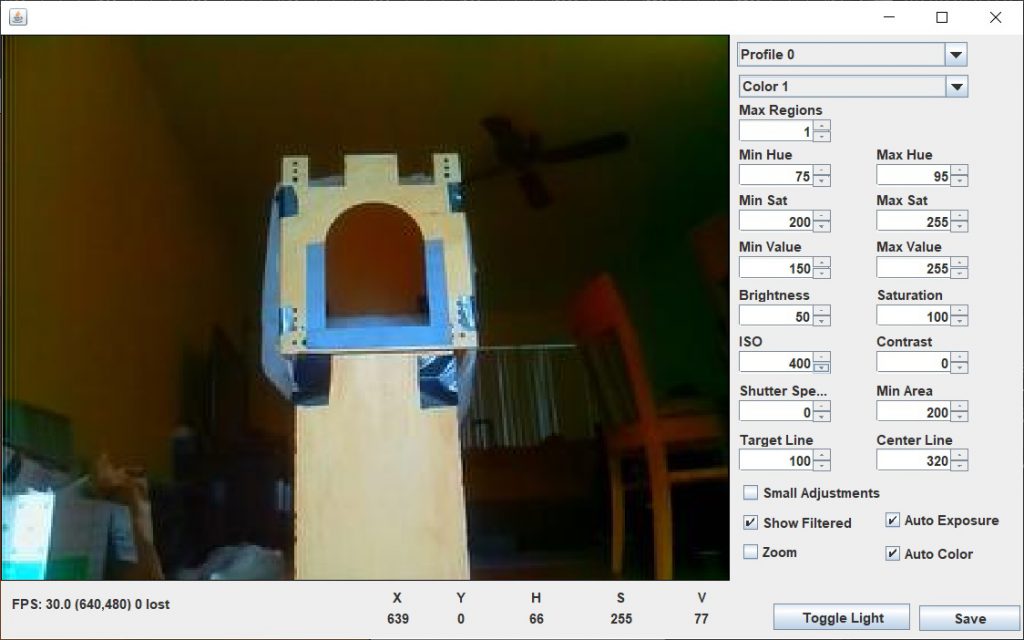
Before you can use the camera, you will need to learn how to use the Image Viewer to preview the camera image and manage the camera settings. Run the program ImageViewer2020.cmd that resides in the PiUtil folder and you should see something like:
The image shows the view from the camera. Currently we have the camera set to use ambient light, but we will want to change that. The vision system works by matching a specific color. This works best if the your target is the only thing that is emitting that color. To accomplish this we will be using retroreflective tape and a green light. The retroreflective tape will reflect the green light back in the direction of the camera and we will be able to match that green color.
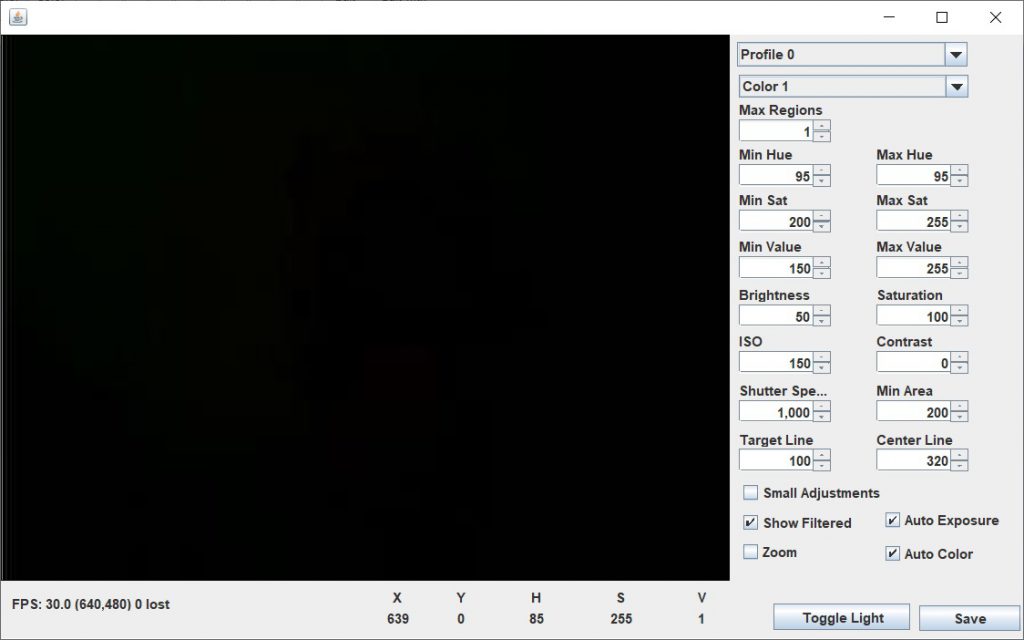
The first thing we need to do is to set the camera parameters so that the camera can only see light sources (everything else will be black). With the Image Viewer running, change the shutter speed to 1000 and the ISO to 150 and the view should become black:
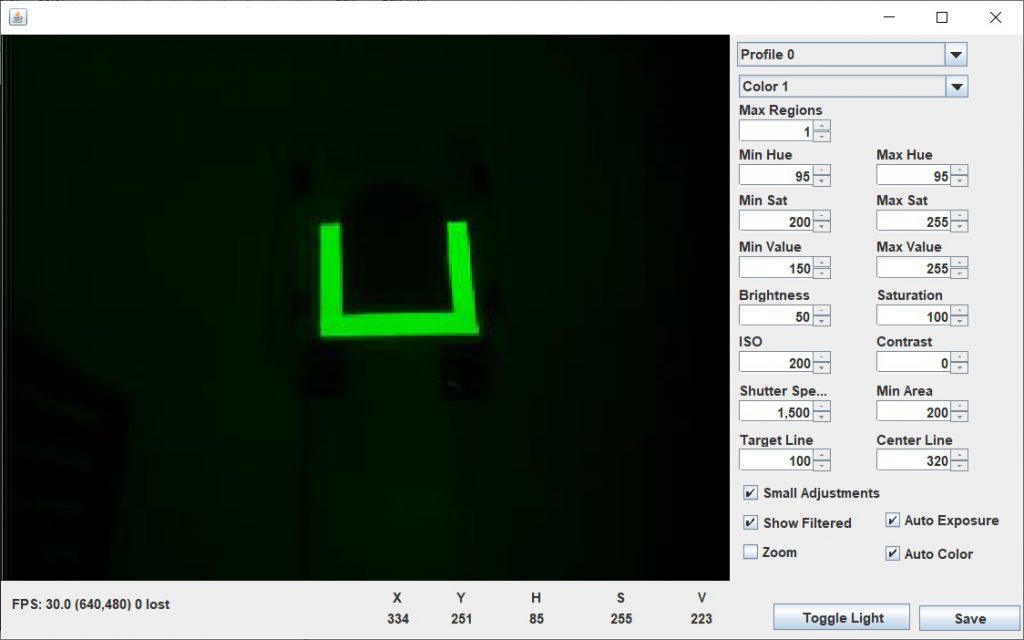
Now turn on the light using the command you previously created and you should see a green image from the reflective tape:
Next we will adjust the parameters on the right so that the camera system recognizes the target. We recognize the target by looking for a specific color, in this case green. To match the color, we don’t use the RGB color space, but rather an alternate HSV color space. HSV stands for Hue, Saturation, and Value. The Hue specifies the actual color (green in this case). The Saturation specifies how vivid the color is with a zero saturation being a black and white image and max saturation being the most robust colors. The Value specifies how bright the image is.
You can click on any portion of the image and the HSV values for that pixel will be displayed at the bottom. For example in this particular example, a pixel in the green region would show:

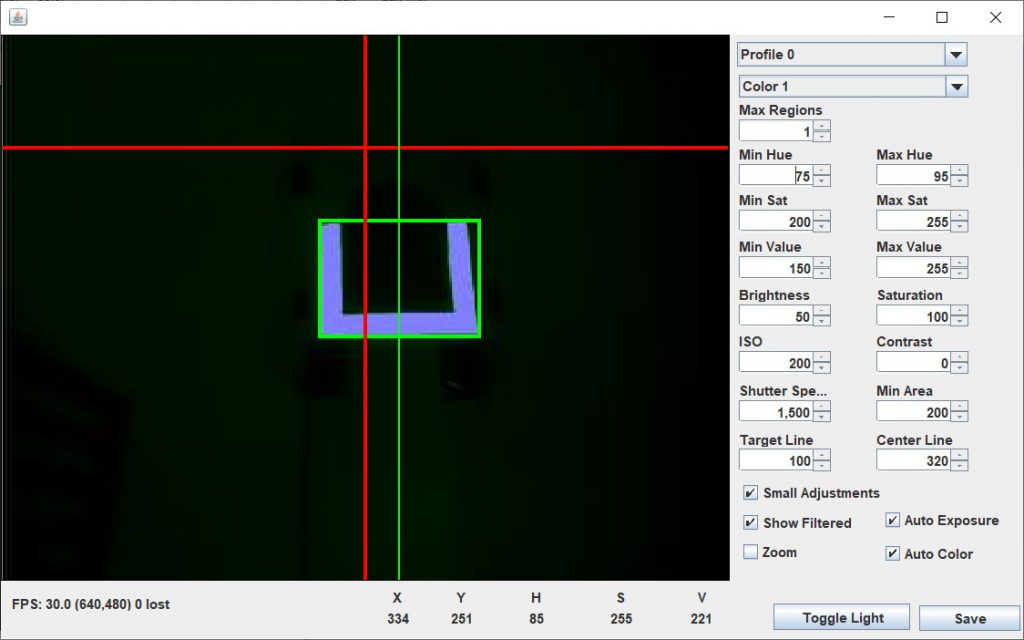
Here we can see that the pixel at position (334, 251) has a Hue of 85, a Saturation of 255 and a Value of 223. We can then set ranges for those values on the right and we should get the following:
In this image, the camera has replaced any green pixels that match the color settings on the right with blue pixels. In addition a bounding box for the image is computed and displayed as a green box. The vertical green line shows the center of the bounding box for the image. You will also notice a vertical red line. The position of this line can be adjusted by changing the Center Line field on the right. We will later use this line to allow us to fine tune the centering of the Turret.
Now you are ready to create your Track Target command. The basic idea is to call the getCurrentFrame() function within the execute() function of your command to retrieve the current frame from the camera. Then call getTargetCenter() to get the offset of the center of the target from the Center Line as set by the Image Viewer. And then set the power of the Turret motor based on how far off of the center the target is. The further off, the more power you should use. You power calculation should be something like:
|
1 |
power = kp * getTargetCenter(); |
Here you will need adjust the value of kp as you did for the P parameter when tuning the motor speeds. You will probably find that you will also need to add a dead zone to keep the camera from oscillating. This would be a small region around the center line where you turn the motor off. Note that since we are measuring the offset of the center of the bounding box from the red Center Line, we can control the position of that line from the Image Viewer and fine tune the shot.
Remember, you should not call getTargetCenter() until you have checked to see that the target is visible by calling isVisible(). If you find that you can no longer see the target then you should stop the motor.
Finally, you should turn on the LED in your initialize() function and turn it off, along with the motor, in your end() function. You will also need to tie this command to a toggle button which lets you turn tracking on and off.


