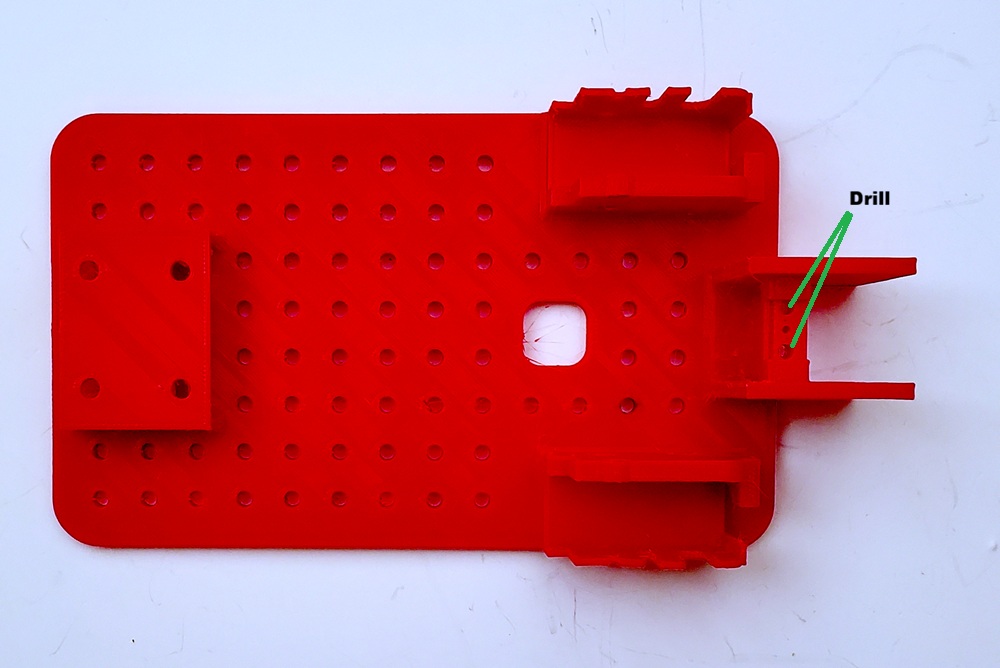
First, drill out the two holes in the Chassis as shown below. This will allow you to see the indicator lights on the line sensor which you will need for calibration.
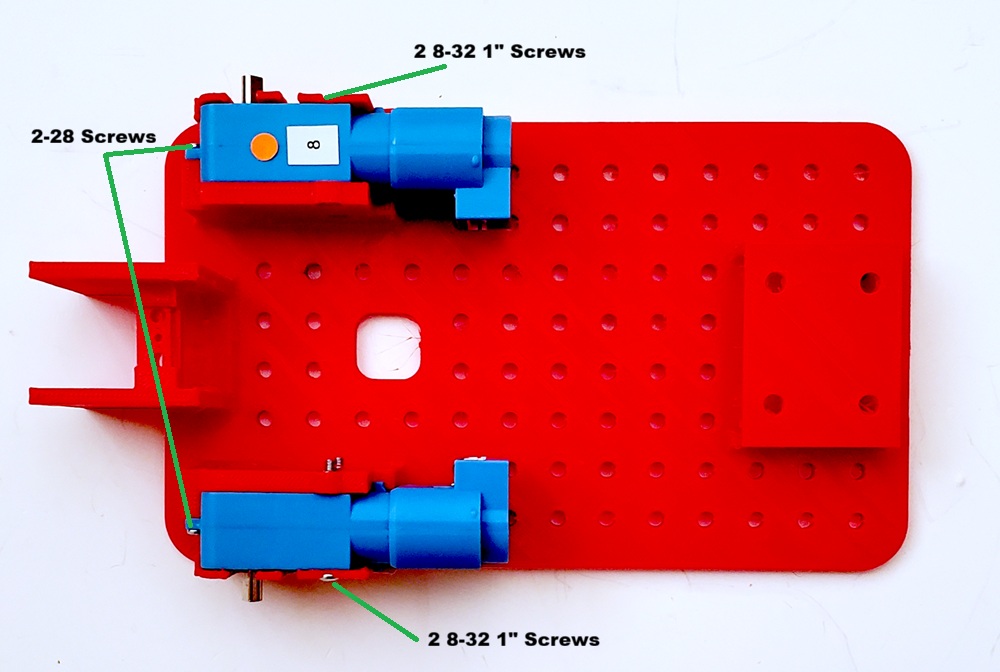
Now attach the two drive motors with four 8-32 screws and nuts and two 2-28 screws as shown below:
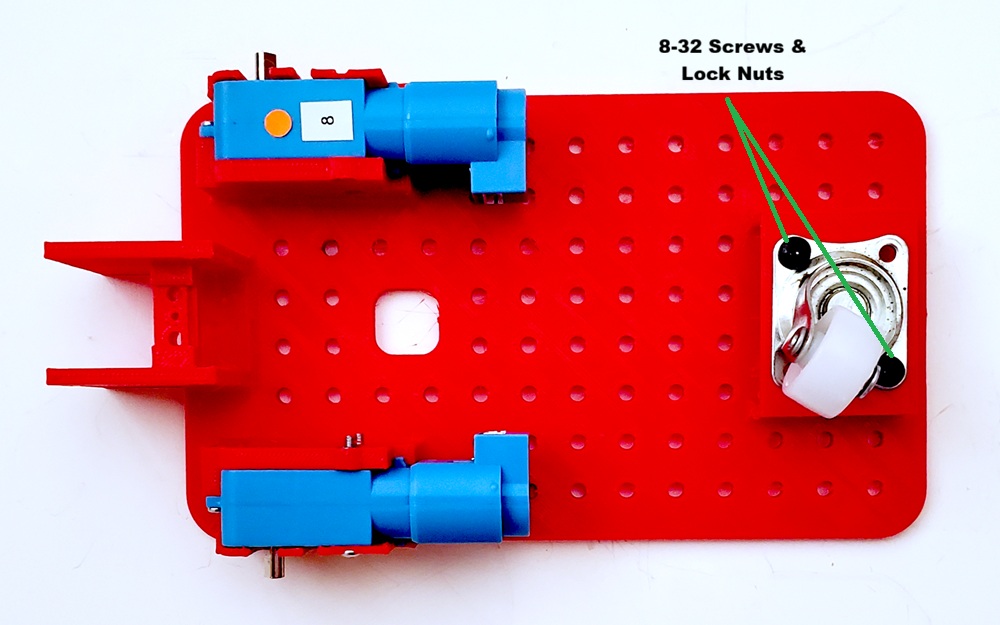
Now attach the Swivel Wheel with two or four 8-32 screws as shown:
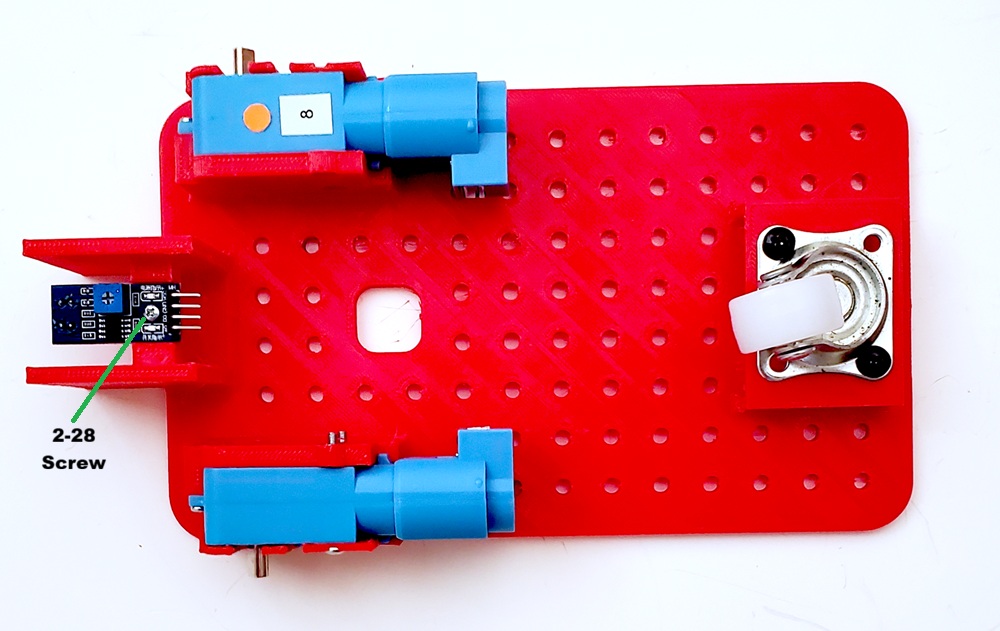
Now mount the IR Sensor using a 2-28 screw as shown:
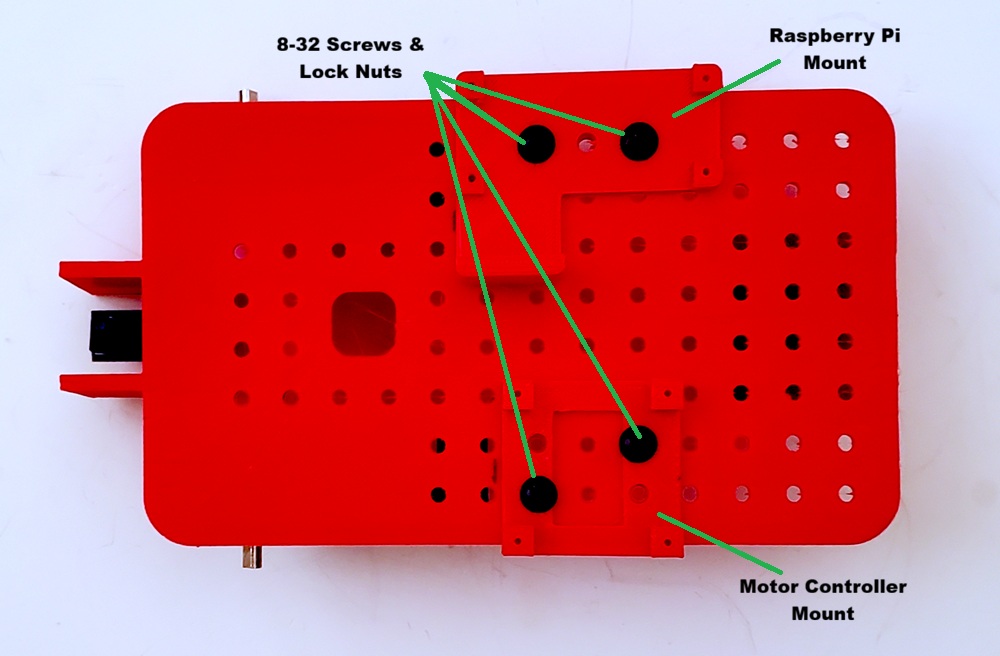
Now attach the Motor Controller and Raspberry Pi mounts with 8-32 screws as shown:
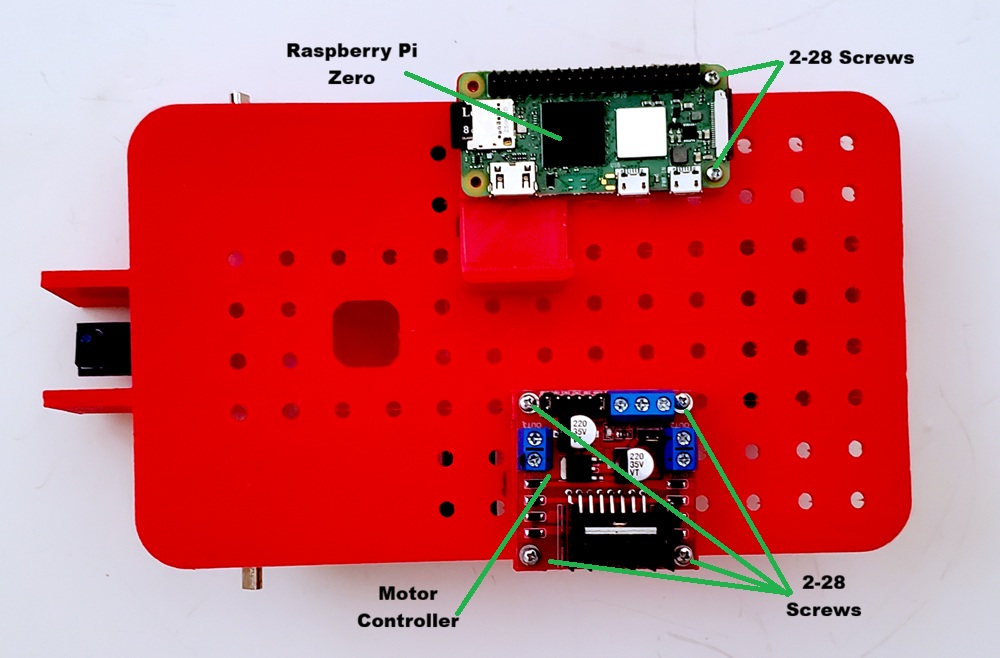
Now mount the Motor Controller and Raspberry Pi Zero with 2-28 screws as shown:
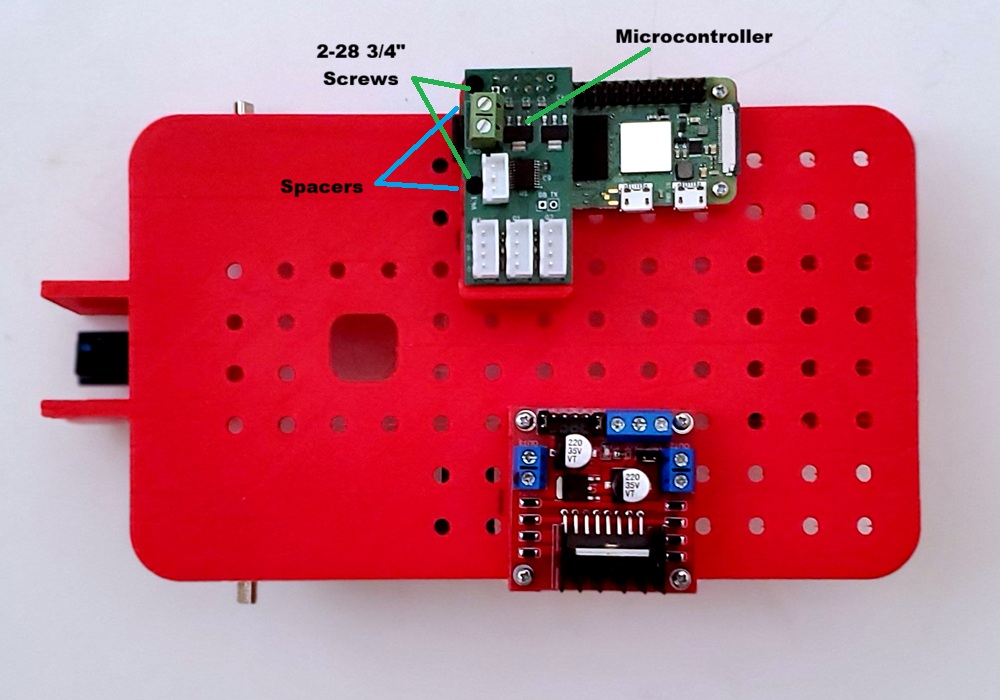
Now mount the Microcontroller Board using two 3/4″ 2-28 screws and spacers as shown:
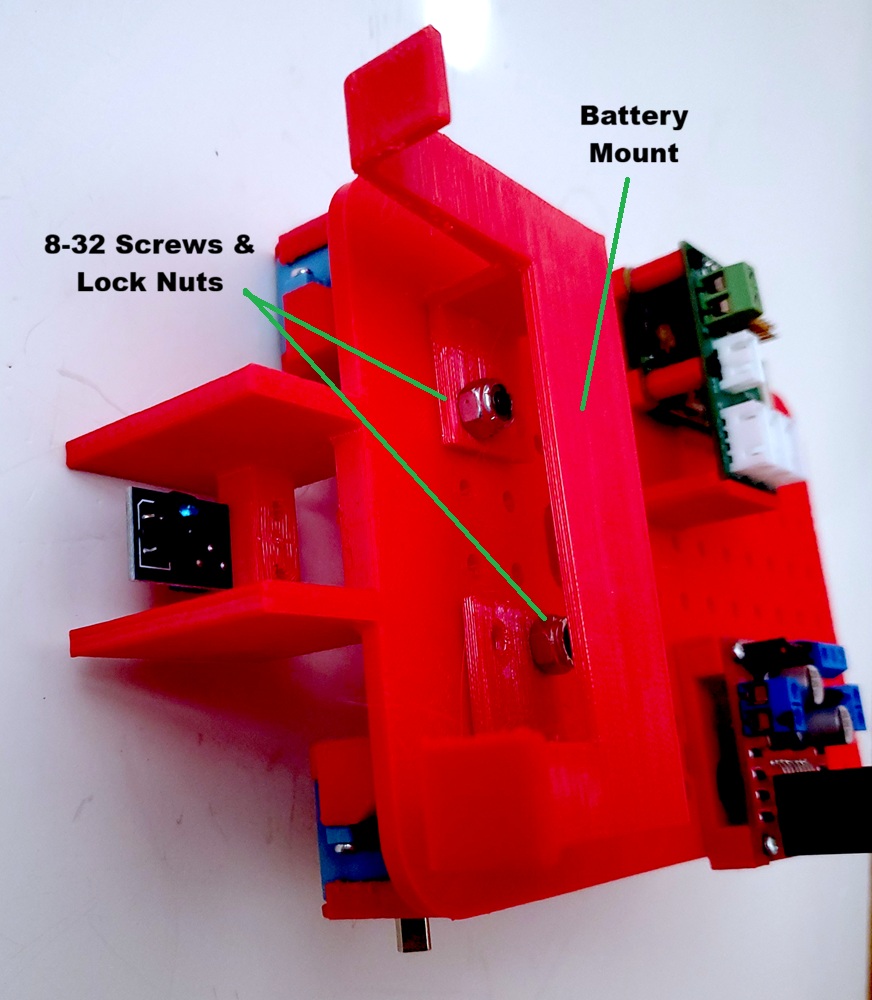
Now attach the Battery Holder using 8-32 screws as shown: