We have modified the Feeder mechanism to hopefully make it more reliable. These are the instructions for assembling this new Shooter/Feeder. If you are using the old Feeder you can find the directions here.
Parts
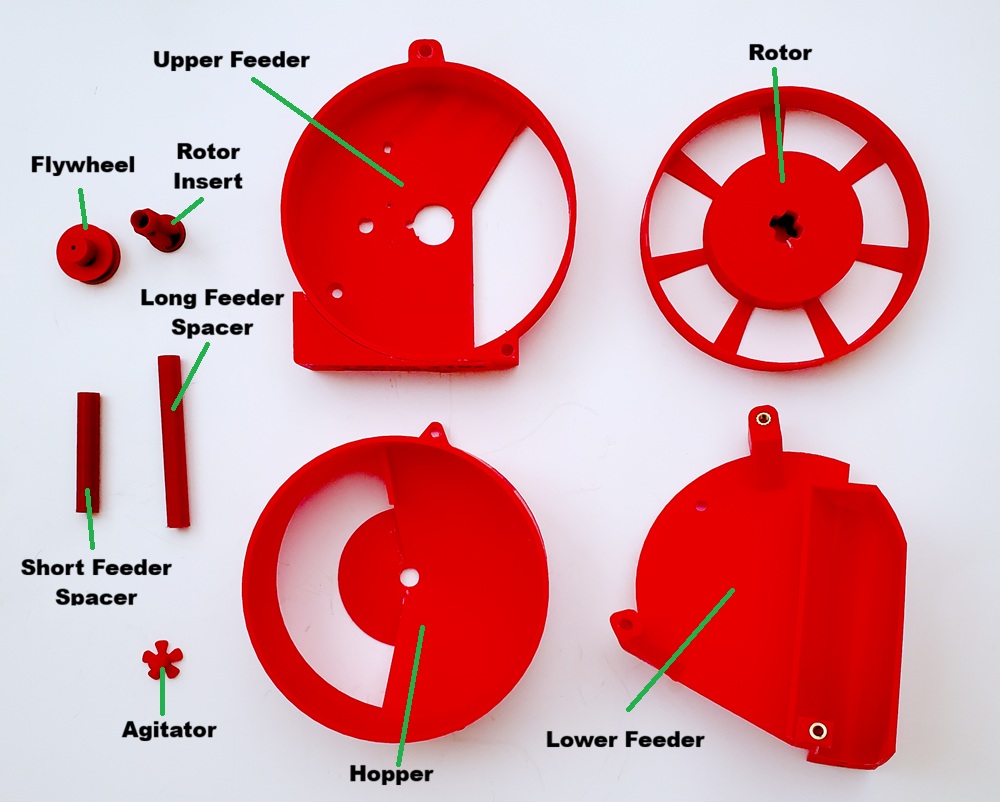
You will need the following 3D printed parts:
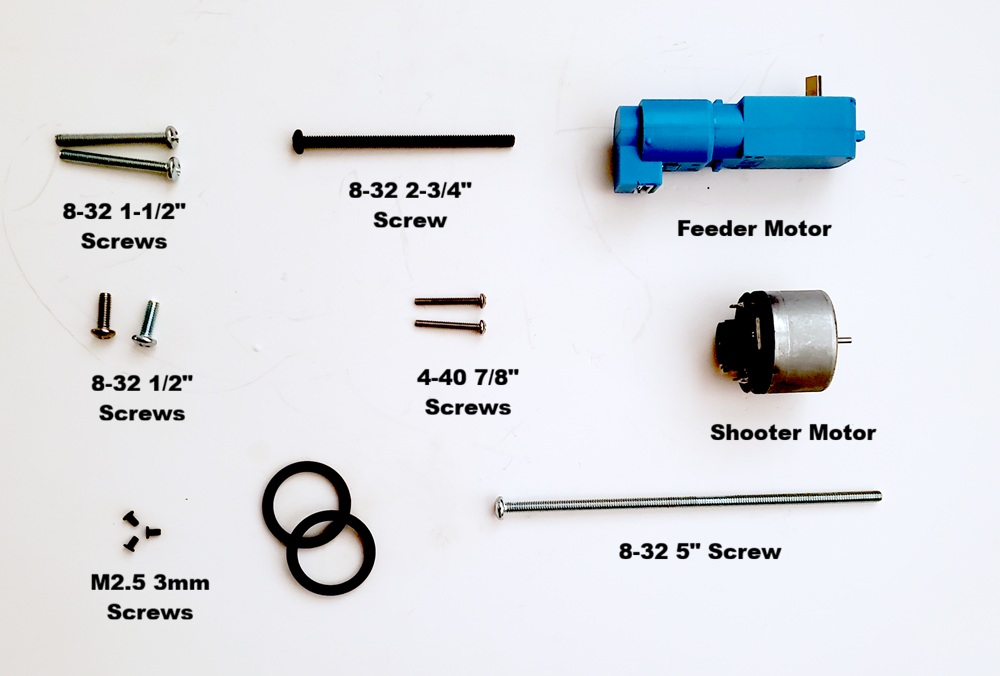
You will also need the following hardware:
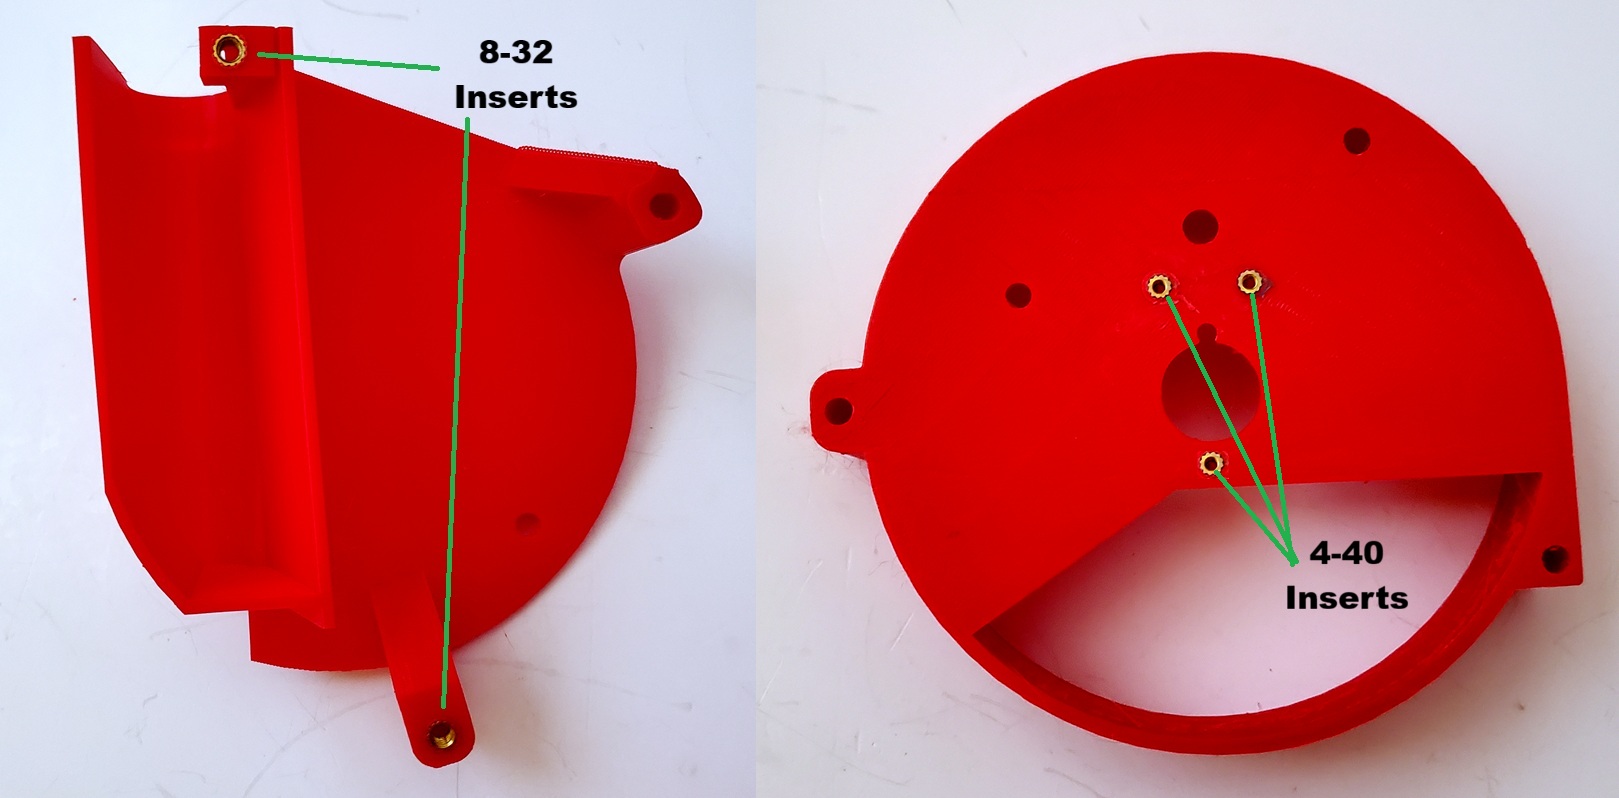
First install two 8-32 and three 4-40 inserts into the Upper and Lower Feeder as shown.
Now attach the Lower Feeder to the Shooter as shown:
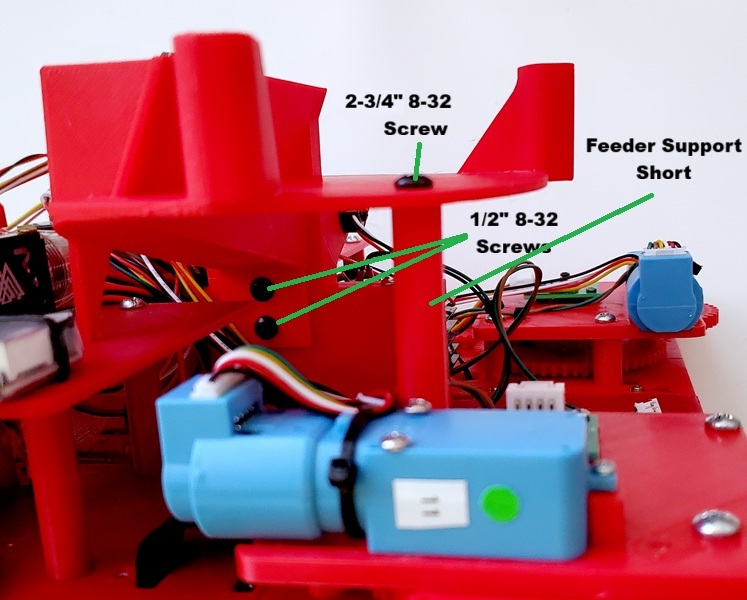
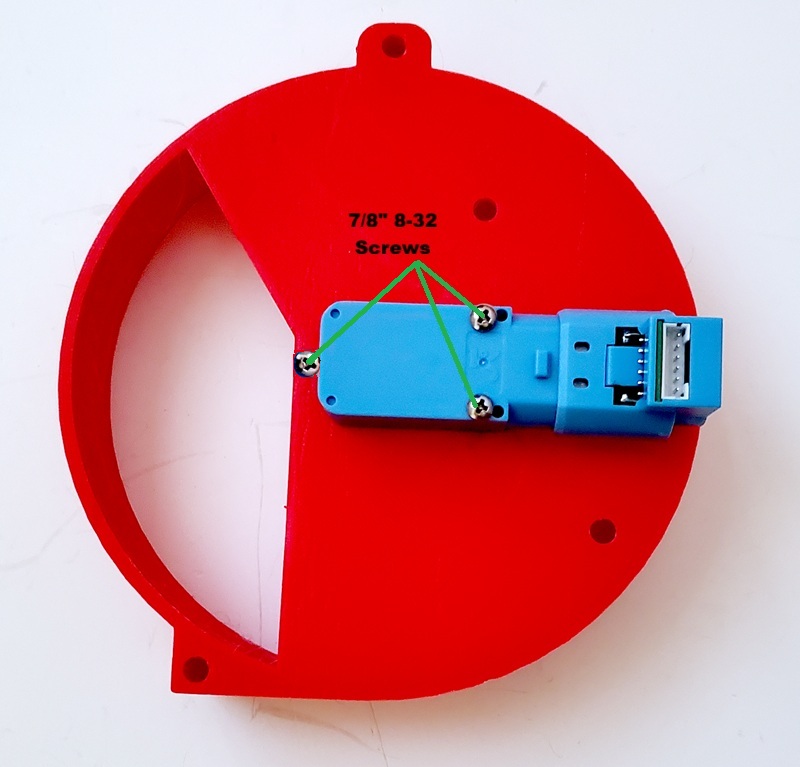
Then attach the Feeder Motor to the Upper Feeder as shown. Note, do not overtighten the screw on the left:
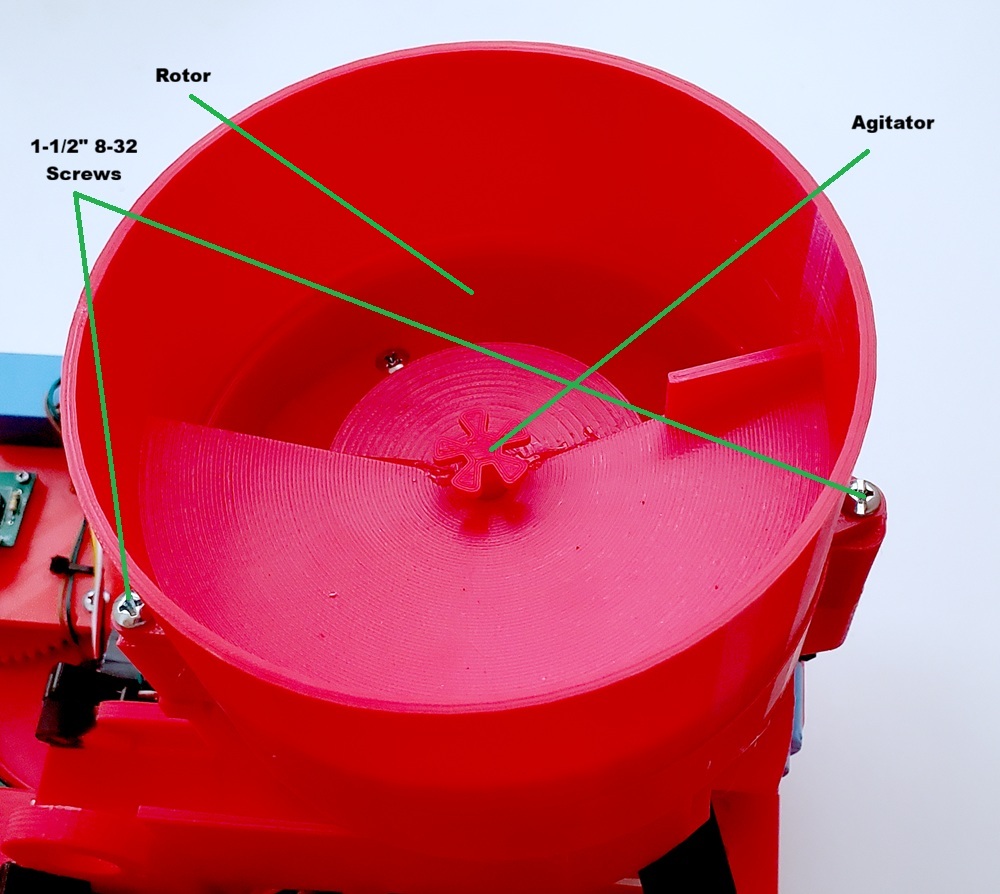
Next attach the Upper Feeder to the Lower Feeder and press fit the Rotor Insert onto the Feeder Motor shaft as shown:

Now add the Rotor and attach the Hopper to the Upper Feeder as shown:
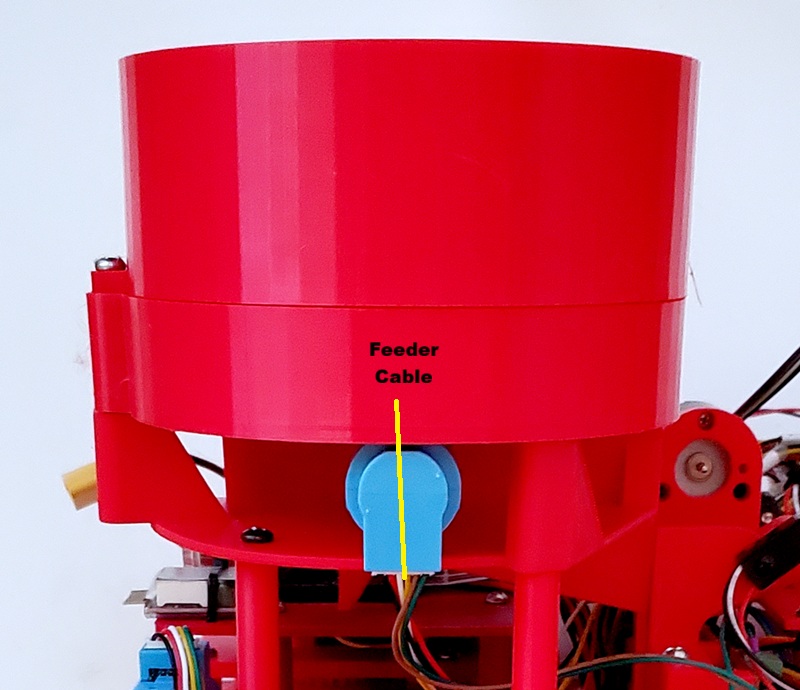
Then attach the Feeder Cable to the Feeder Motor as shown:
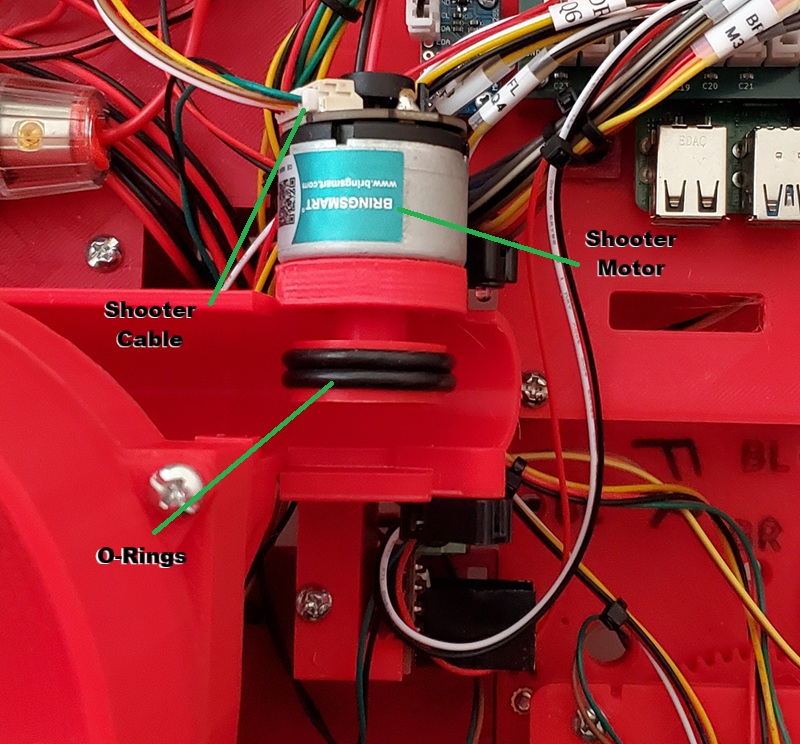
Next mount the Shooter Motor to the Shooter Mount as shown. Warning, using screws that are longer than 4mm can damage the motor (don’t ask me how I know that).

Finally, connect the Shooter Cable, attach the two O-Rings to the Flywheel and then press fit the Flywheel onto the Shooter Motor as shown: